Here are the steps to integrate with Microsoft Entra ID (previously Azure AD) using Volt Foundry Identity services.
- Register an Application in Microsoft Entra Admin Center:
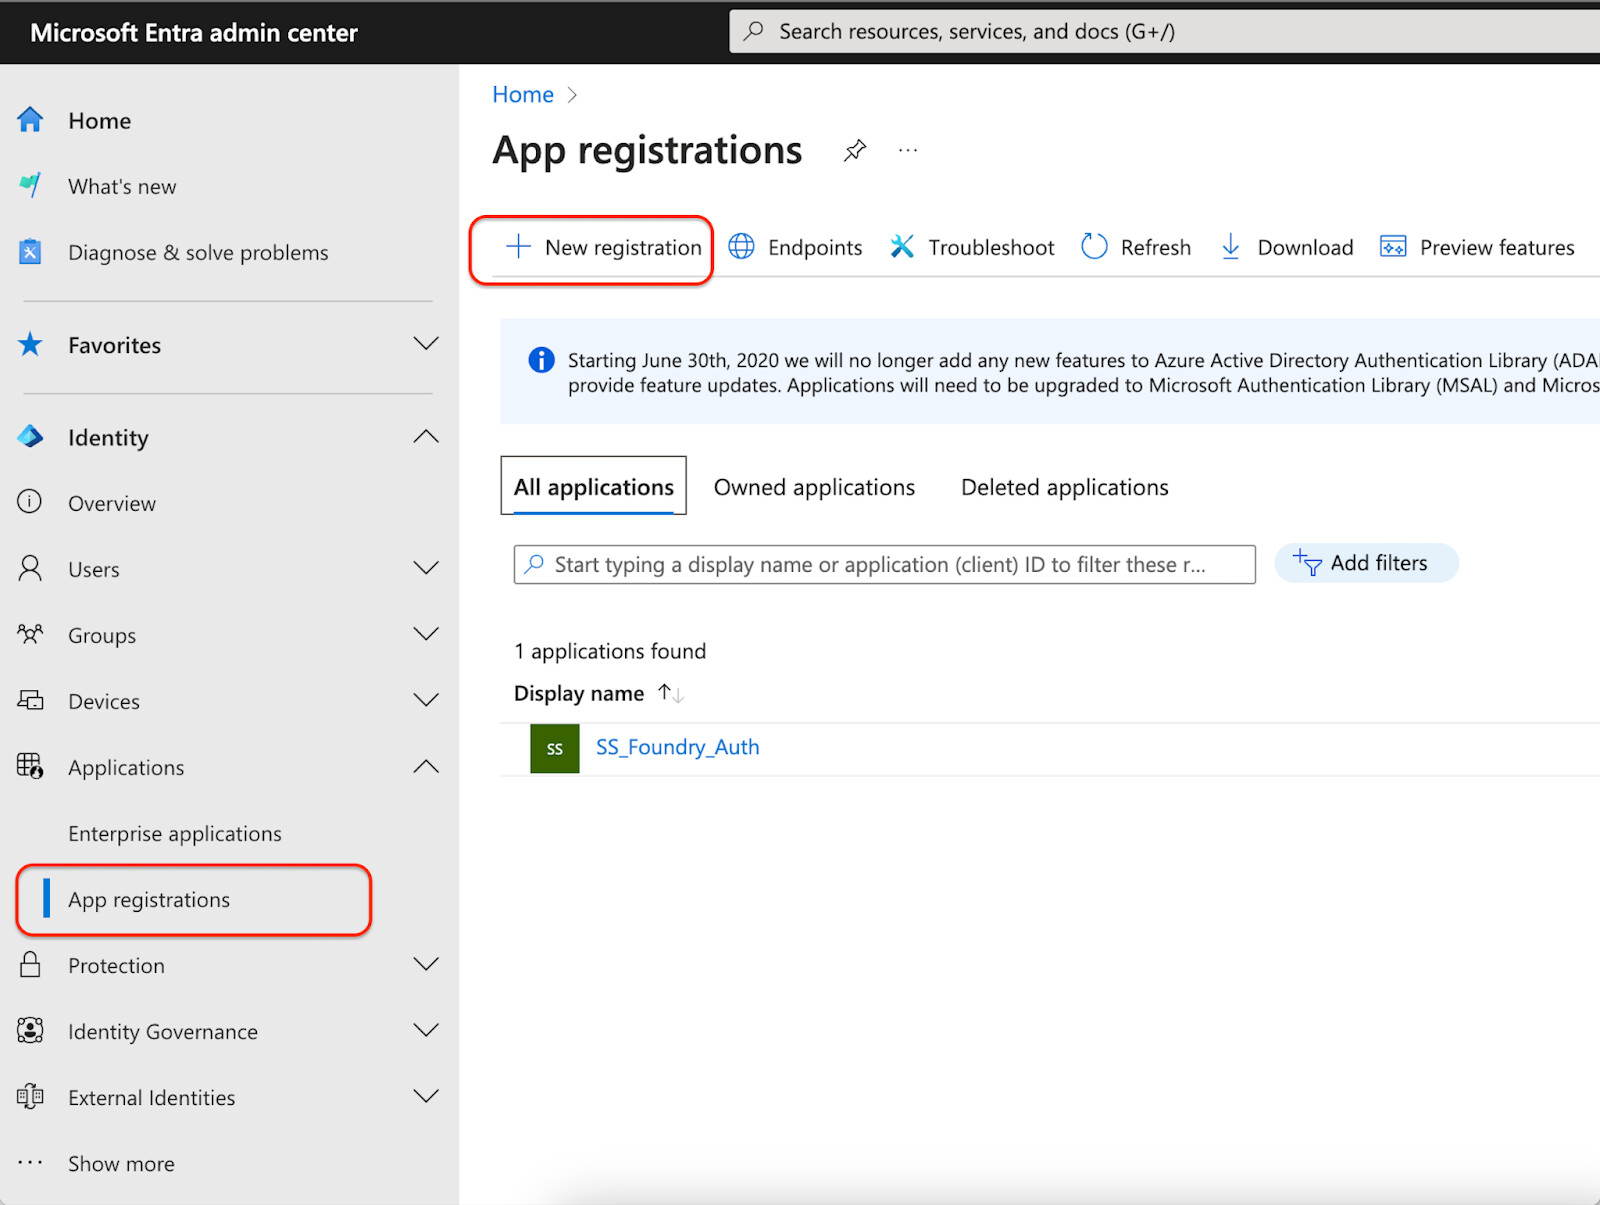
- Navigate to the Microsoft Entra Admin Center and sign in with your MS365 account.
- Select “App registrations” and click “New registration”.
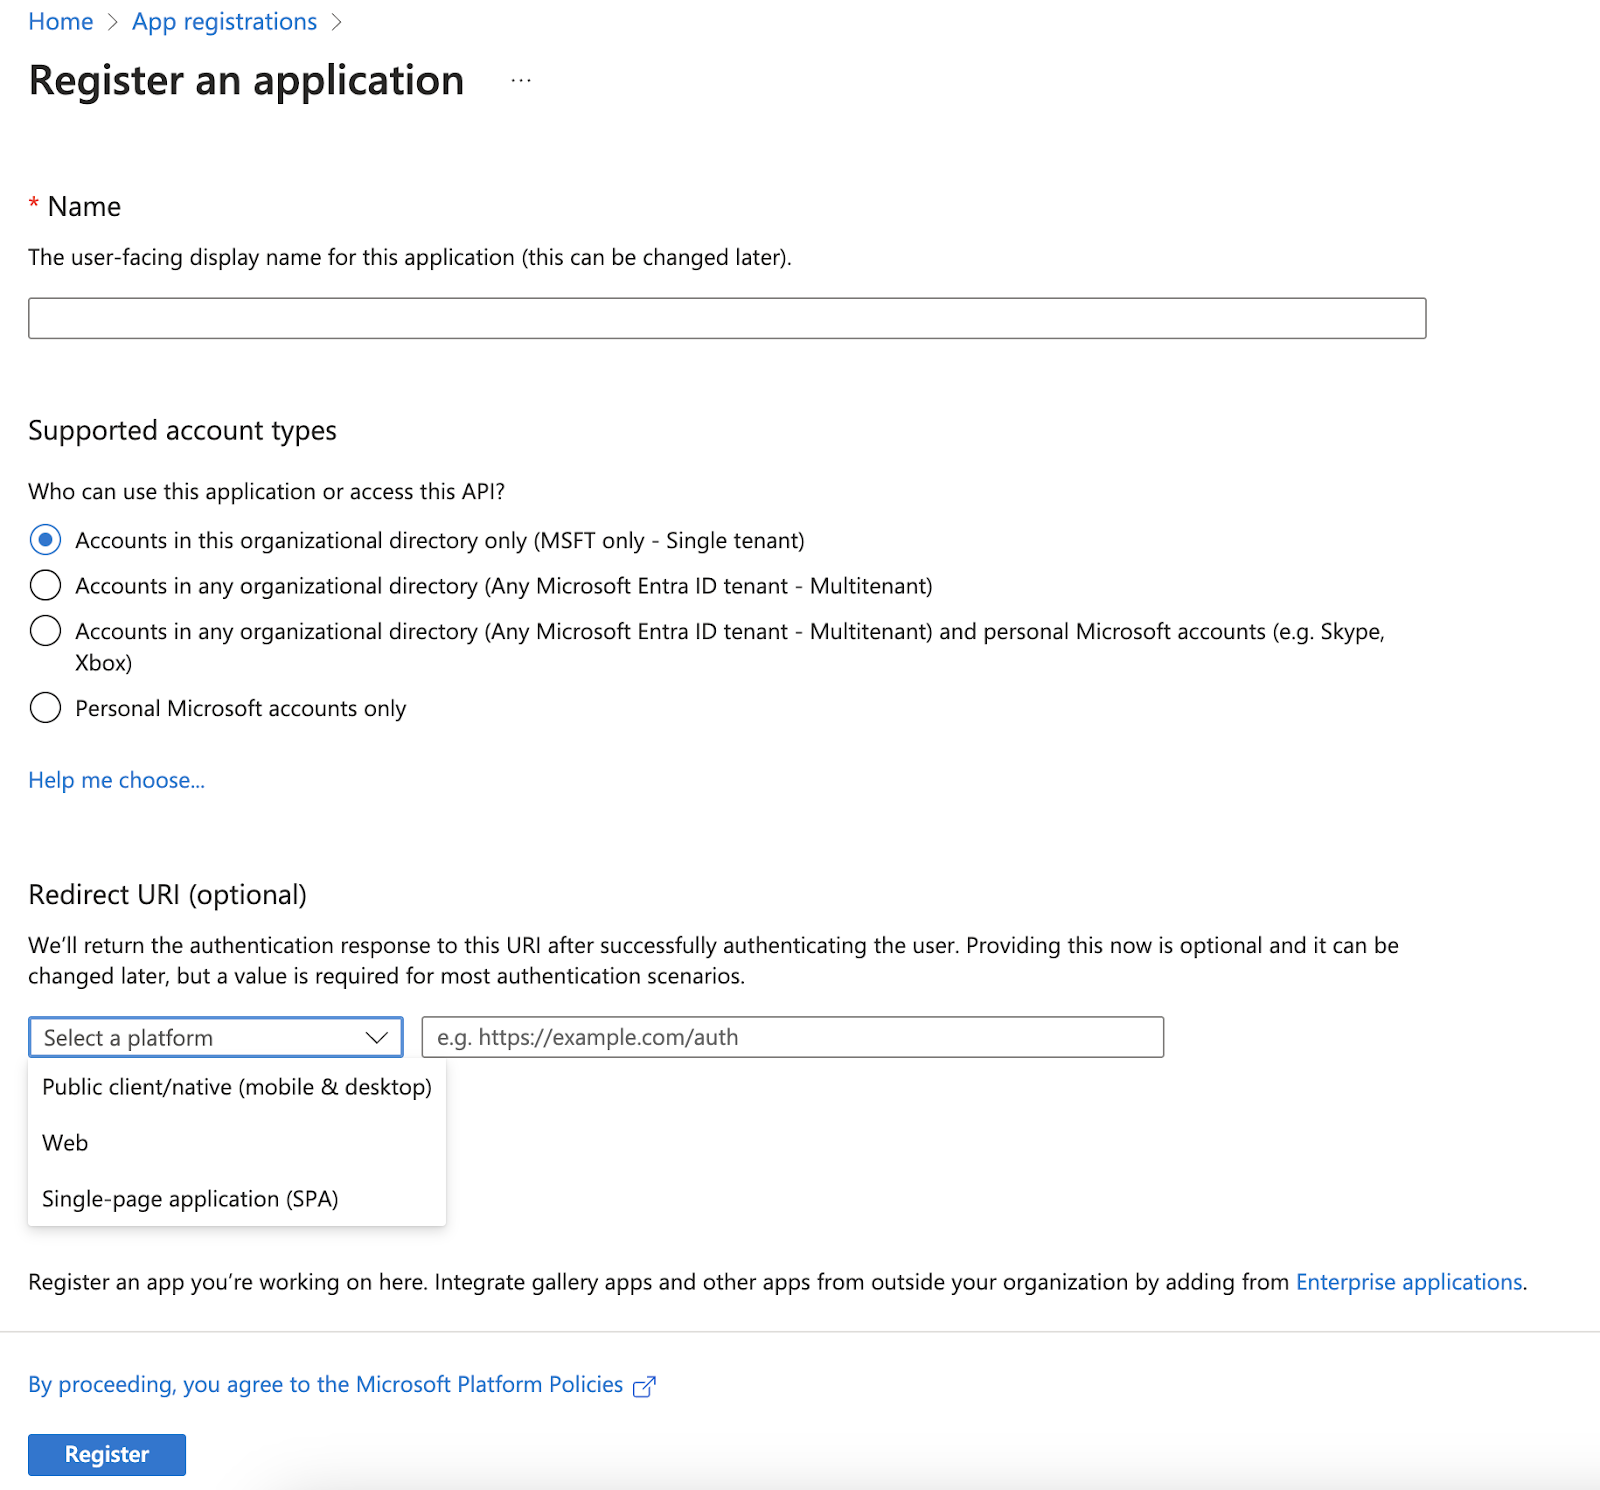
- Provide a name for your application and select the supported account types.
- Set “Web” as the Platform and set the redirect URI as copied from Foundry (refer Step #4), This is the endpoint where Microsoft Entra ID will send the authentication responses.
- Click “Register”.
- Generate Client Secret:
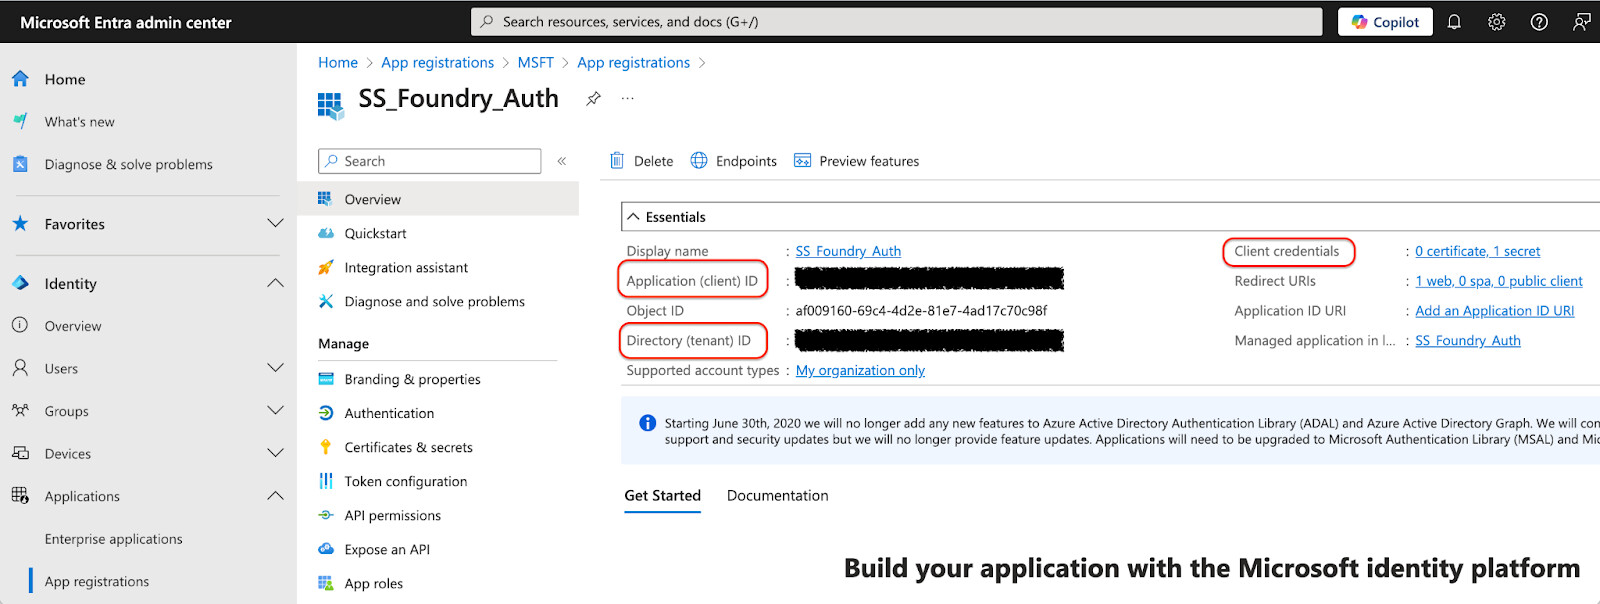
- Go to “Certificates & secrets” in your application.
- Click “New client secret”.
- Provide a description and set the expiration time for the secret.
- Click “Add” and copy the Secret Value immediately, as it cannot be retrieved later.
- Also copy Client ID and Tenant ID from the application. These values will be required in the following steps.
- Configure Application Permissions:
- In the registered application, go to “API permissions”.
- Click “Add a permission” and select the Microsoft APIs or APIs your application needs to access.
- Choose the necessary permissions (delegated or application permissions) and click “Add permissions”.
- If required, grant admin consent for the permissions.
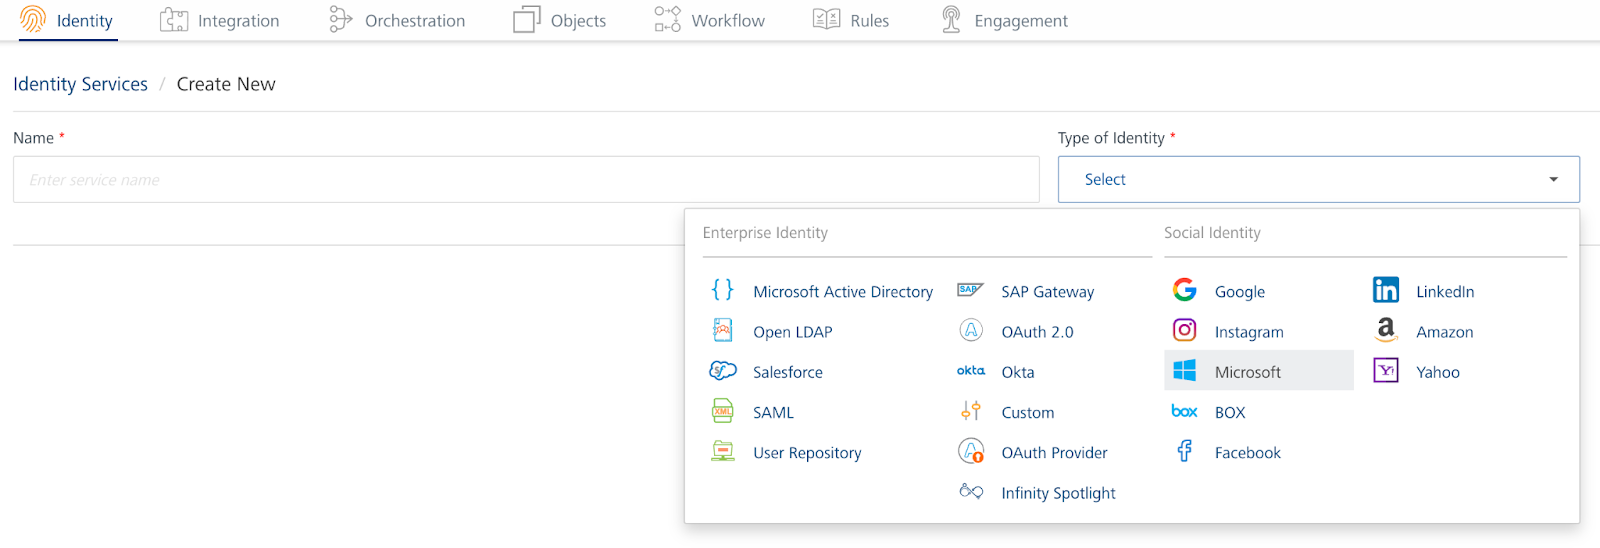
- Add a new Identity service in Volt Foundry:
- Go to your Foundry app. Under the Identity tab, create a new service of type Microsoft and update the following fields.
**Note: Only the minimum set of fields to be updated, are mentioned here. You may end up updating more advanced fields depending on your use cases. E.g. scope, profile attributes, security settings, etc. Please refer to the latest Volt Foundry documentations for more information on all the fields.
Grant Type: Depending on your use case, you may need to select different Grant Type which would require different settings at the Entra Admin side as well. For this example, I have kept it to default one, i.e. Authorization Code which is most commonly used.
Callback URL: This URL needs to be added in Step #1.
You can pause here until Step #1, 2 & 3 are completed.
-
Name
-
Authorize Endpoint and Token Endpoint - Replace “common” with the Tenant ID copied from Entra. E.g.
https://login.microsoftonline.com/298rta22-ei1a-431f-b2fb/oauth2/v2.0/authorize -
Client ID and Client Secret from Entra
-
Save and then Test your Identity service to ensure a successful response is received from Entra.
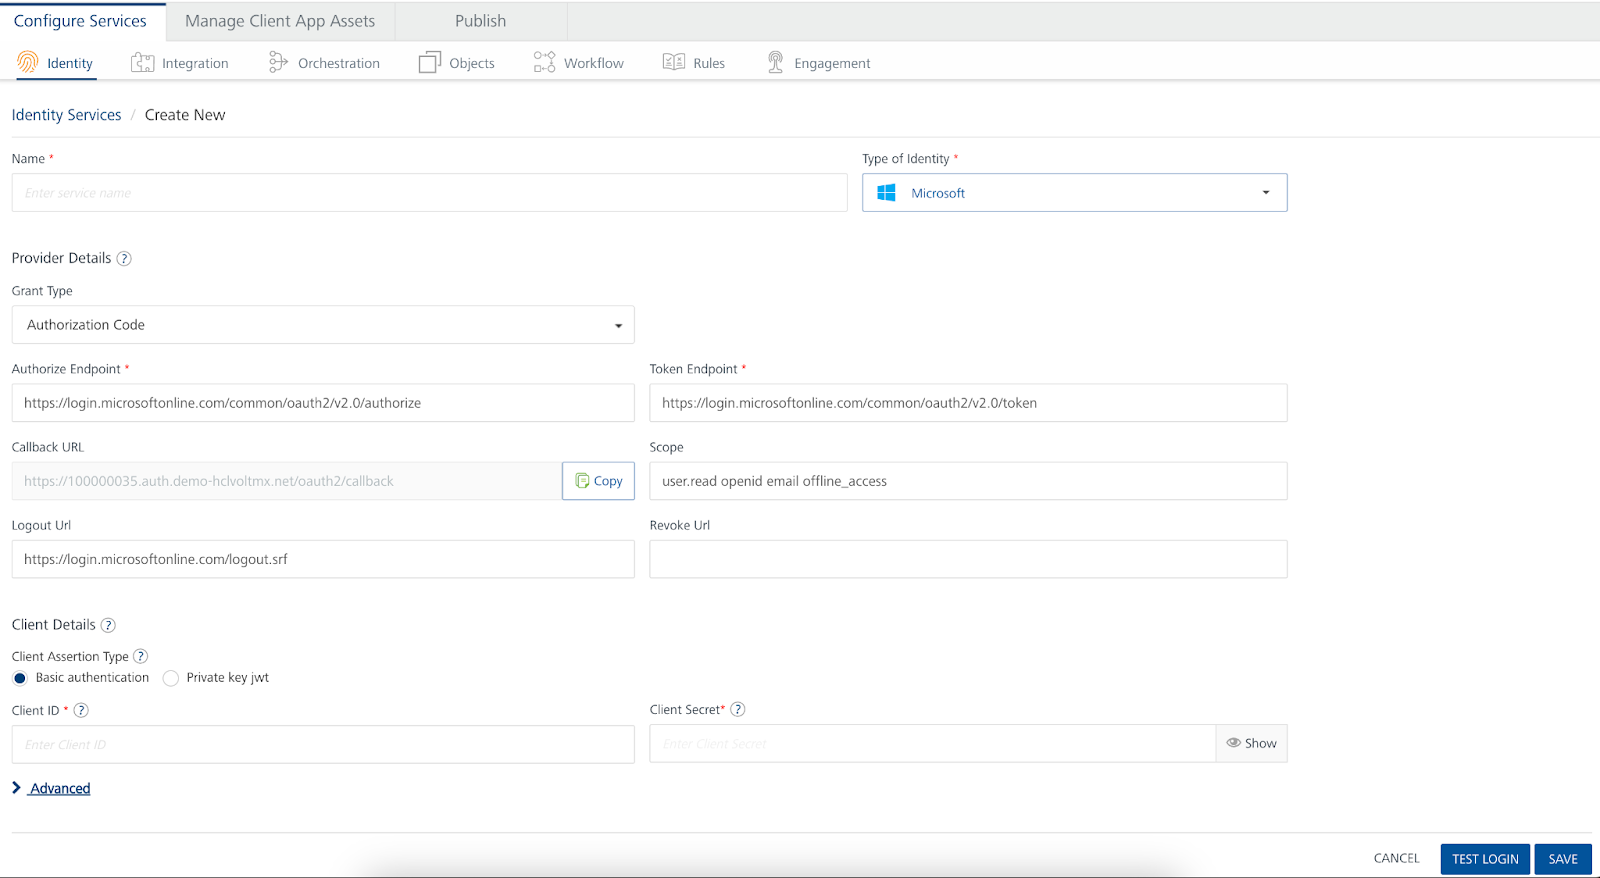
**Note: For the first time login, you will be prompted to allow necessary permissions defined in scope.
Your Volt Foundry Identity service integrated with Microsoft Entra ID is now ready to be used in the Integration and Object services from Foundry console.