Volt IRIS supports reading and writing NFC tags. In this article we will cover how to read the NFC tags using IRIS application.
-
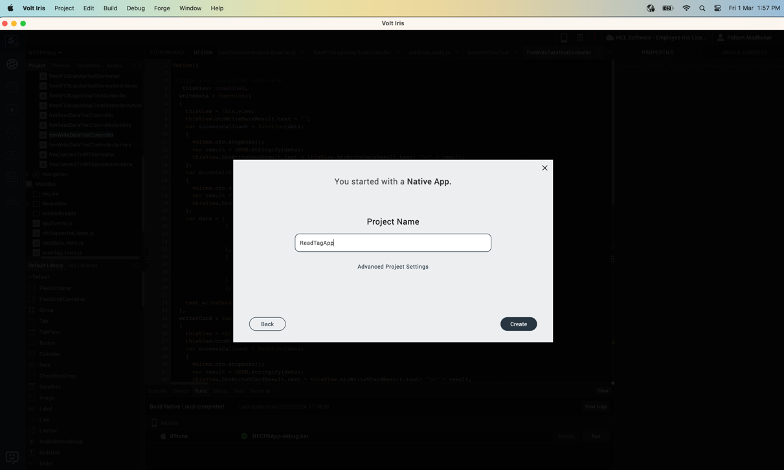
Create a Native app
-
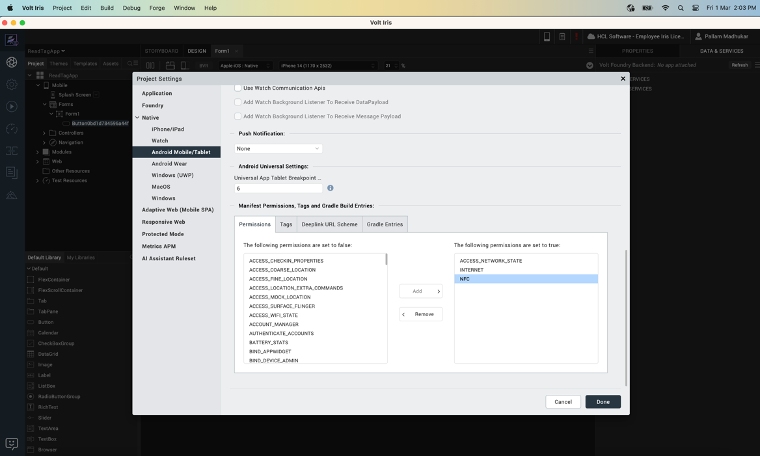
Configure NFC for your project.
2.1. Add Android NFC capability.
Open Project Settings → select Native Tab → select Android Mobile/Tablet → In Manifest Permissions (Permission Tab) → add NFC and click Done.2.2 Add iOS NFC capability
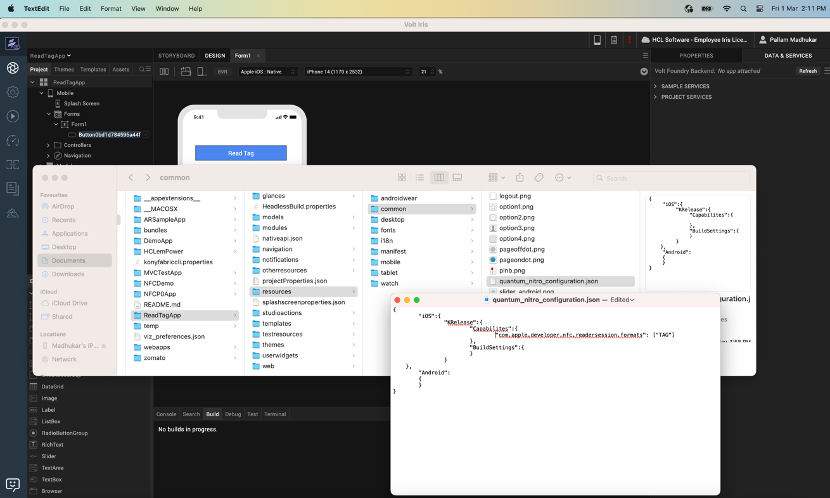
Open Project Resources/common/quantum_nitro_configuration.json and add NFC entitlement.
2.3 Add NFC usage description for iOS
Open Project Resources/common/infoplist_configuration.json and add NFCReaderUsageDescription key and value. -
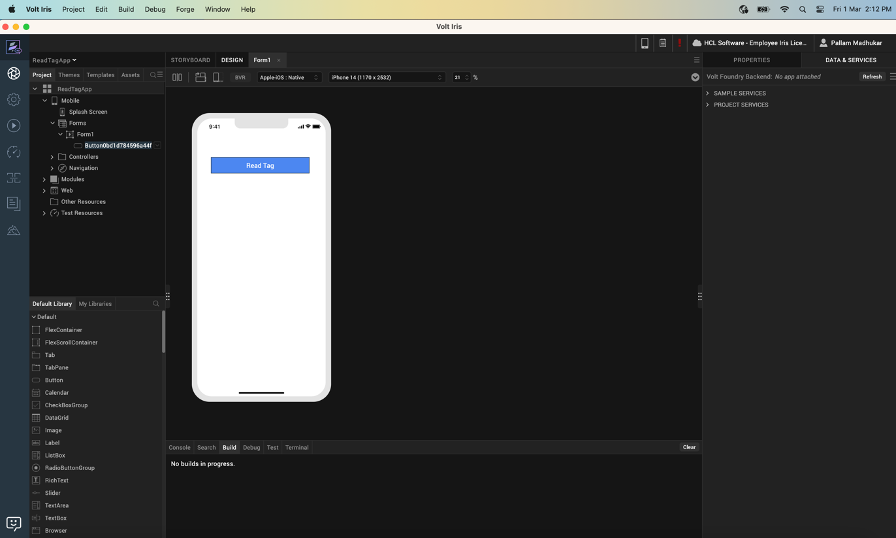
Add a button to Form
Drag and drop the button widget and change text to “Read Tag”. -
Add function to FormController
4.1. check NFC availability in device

if (voltmx.os.hasNFCSupport()) {
  //call NFC API's
} else {
  alert("NFC is not Supported in this device");
}
4.2 start scan session and configure success and error call backs.
var errorCallback = function(error){
  if(error.errorCode === voltmx.nfc.ERROR_NO_TAG){
    alert("Tag no longer nearby to read.");
  }
};
var success = function(tags){
  if(tags!==undefined && tags.length>0){
    if(tags.length===1){
      //read data from tag or write data to tag
    }
    else {
      var update = {"message":
                    "More than 1 tags found. Please present only 1 tag."};
      voltmx.nfc.updateUI(update);
    }
  }
};

var config = {
"scanContinuously": false,
"message" : "Hold your device near an NFC tag."
};
voltmx.nfc.scanTag(config, success, errorCallback);
The expected screen on device(iOS):

4.3. call readData API to read the data records of the NFC Tag.
var readSuccessCallback = function(tagData){
  //show/save tagData
};
var errorCallback = function(error){
  if(error.errorCode === voltmx.nfc.ERROR_NO_TAG){
    alert("Tag no longer nearby to read.");
  }
};
tags[0].readData(readSuccessCallback, errorCallback);
The expected screen on device(iOS):
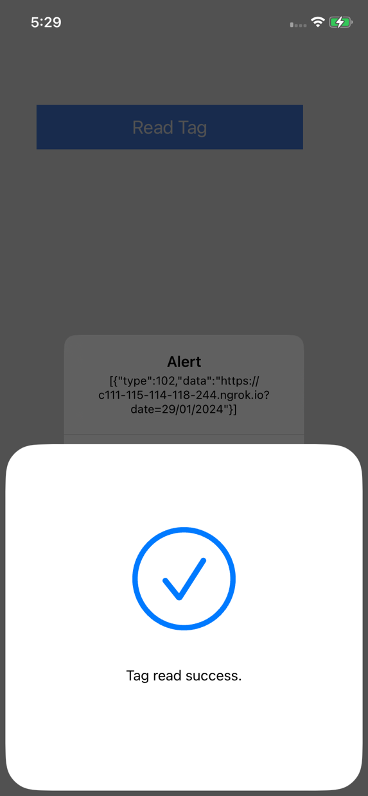
4.4. show/save Tag records and then stop scan
 var result = JSON.stringify(tagData);
 voltmx.nfc.updateUI({"message": "Tag read success."});
 voltmx.nfc.stopScan();
 alert(result);
Note: You can copy the following complete function to your controller.
readTagRecords: function ()
{
 if (voltmx.os.hasNFCSupport()) {
   var errorCallback = function(error){
     if(error.errorCode === voltmx.nfc.ERROR_NO_TAG){
       alert("Tag no longer nearby to read.");
     }
   };
   var success = function(tags){
     if(tags!==undefined && tags.length>0){
       if(tags.length===1){
         var readSuccessCallback = function(tagData){
           var result = JSON.stringify(tagData);
           voltmx.nfc.updateUI({"message": "Tag read success."});
           voltmx.nfc.stopScan();
           alert(result);
         };
         tags[0].readData(readSuccessCallback, errorCallback);
       }
       else {
         var update = {"message": "More than 1 tags found. Please present only 1 tag."};
         voltmx.nfc.updateUI(update);
       }
     }
   };
   var config = {
   "scanContinuously": false,
   "message" : "Hold your device near an NFC tag."
   };
   voltmx.nfc.scanTag(config, success, errorCallback);
 } else {
   alert("NFC Support is not available in this device");
 }
}
-
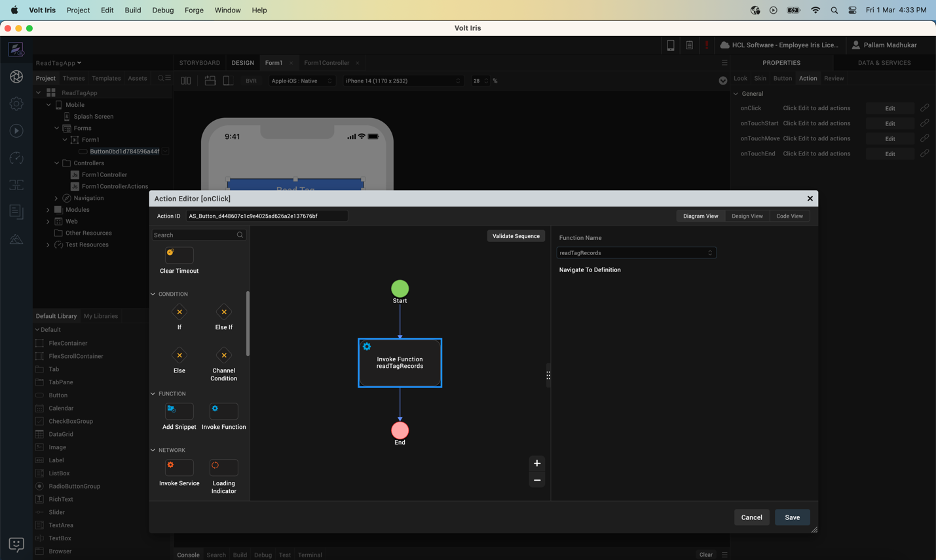
Map function to the button click in action editor.
-
Build and Run the app.
Note: Tap or reach the NFC tag to see tag data.
Documentation of all the NFC API’s can be found here.