Trigger workflow
In part two of this 2 part series, I will show how we can add AI assistant to the workflow to help in making decisions faster and be more productive when a request is submitted. But before we add the integration, let’s see how we can trigger the workflow.
In the object workflow, since the workflow can only be triggered when the value in the property is updated, the standard creation or updating via the low code method (i.e. via no code configuration) will not work, instead use JavaScript code to trigger the workflow instance. Add the code into the form controller and call the code via Invoke Function (Image 1).

Image 1
Example code can be seen below:
    createNewRequest: function(){

        var client = voltmx.sdk.getCurrentInstance();
        var objSvc = client.getObjectService("ObjSvcCashAdvanceWorkflow",{"access": "online"});
        var dataObject = new voltmx.sdk.dto.DataObject("Status");
        var custPriID = this.view.tbxCustomPrimaryField.text;
        var WFDecision = this.view.lblDecision.text;

        dataObject.addField("ID", custPriID);
        dataObject.addField("Name", "AppCaseAdvance");
        dataObject.addField("Amount", this.view.tbxAmount.text);
        dataObject.addField("RecordID", custPriID);
        dataObject.addField("Action", WFDecision);
        dataObject.addField("ActionStatus", WFDecision);

        var options = {"dataObject": dataObject};
        objSvc.customVerb("create",
        options,operationSuccess.bind(this),
        operationFailure.bind(this));
    }

    function operationSuccess(res){
        voltmx.print("##### Integration Service Response for success: " +
        JSON.stringify(res.ID) + " " + custPriID);
    }

    function operationFailure(res){
        voltmx.print("##### CreateNew Response for failure: " +
        JSON.stringify(res));
    }
Updating of action
The above method will also be the approach to updating the status of the workflow instance based on the different stages.
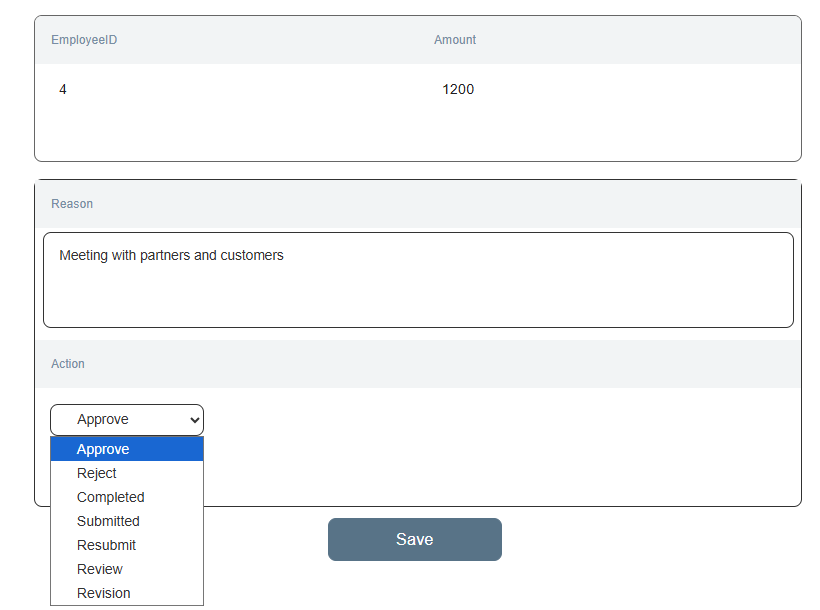
Image 2
Add AI Assistance
As part of the cash advance, the user will have to provide a reason for the application, but there can be various reasons that will have to be interpreted based on the requirements by the reviewer before approving, rejecting or requesting for a Finance review. So instead of having to set up various business rules to cover all the possible reasoning for approval and have someone manually determine the path to follow,let’s add an AI assistant to handle the initial decisioning to determine whether to Reject, Approve or Review based on the amount + reasoning. All we have to do is add an integration point using json as the Service Type (Image 3) in Foundry.
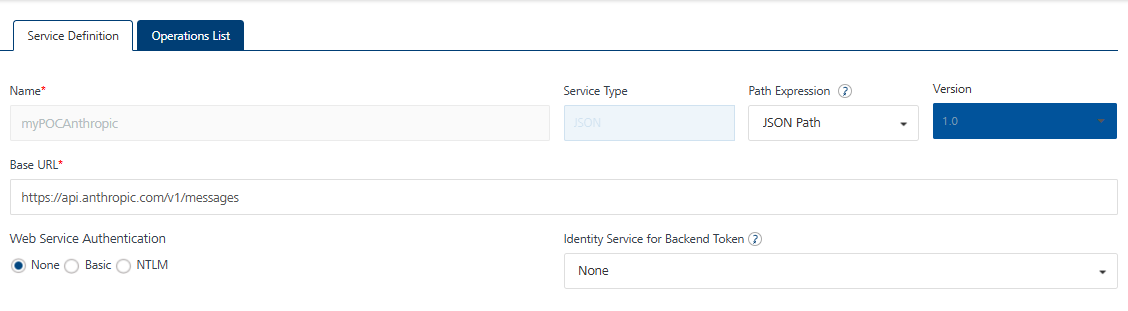
Image 3
Note that the following method assumes that Anthropic is used for the AI assistant, if another AI tool is used, please check on the required input from the tool’s site for required integration.
Add a method and ensure that the HTTP method is set to POST (Image 4). Depending on which AI tool is used, the setting might be different, in Claude, for the system prompt, the following prompt was set:
You are an accountant in the finance department and have to review cash advance amount and reasons to make a decision of approve, reject or review based on the following:
- Amount >= 5500 and reason is conference or partner meetings and 1 week or more = review
- Amount < 1k = approve
- Amount > 1k but < 5k and reason is business meeting with confirmed success = approve
- Amount between 5k to 55000 and with no good reasons like partner or business meeting= reject.
Reply with Decision as only APPROVE, REJECT, REVIEW and only give a reason for rejections.
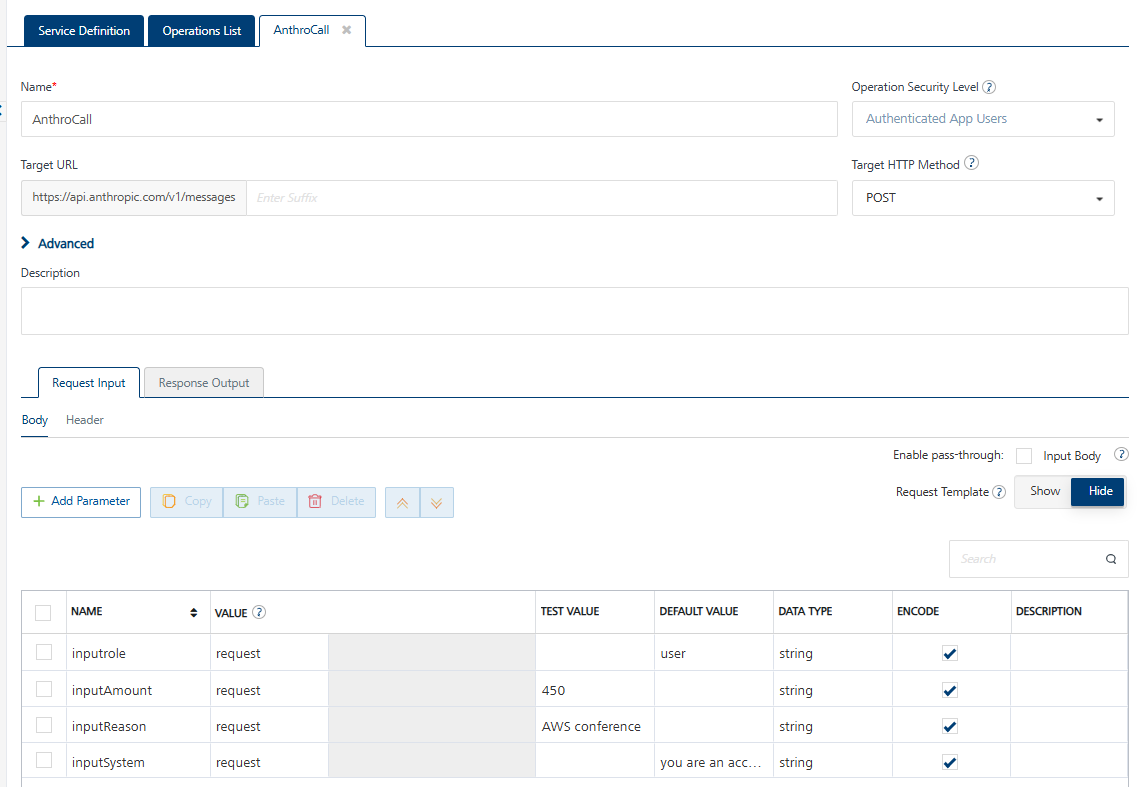
Image 4
From the Iris form, set up the following configuration (Image 5) in the submit button. Note that the Amount and Reason is added into the global variables to be used in the Anthropic call.
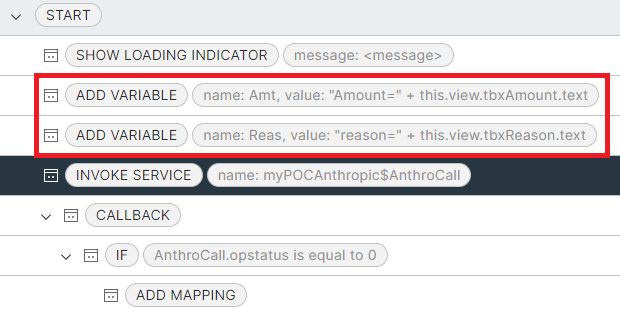
Image 5

Image 6
The returned service call is then mapped to another global variable.
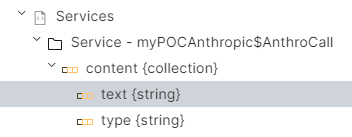
Image 7
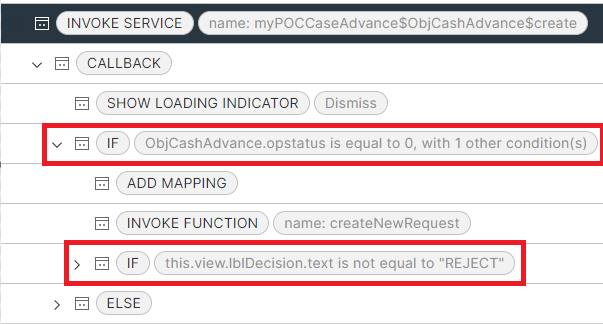
Image 8
Two conditions (Image 9) are set to be met before the function createNewRequest can be triggered, and that is if the decision is not “Reject”. The reason for this condition is that workflow instances should only be triggered if the record for the business data is successfully created.

Image 9
Another condition is set to redirect the form to the main grid when the decision is not equal to “Reject” (Image 8). If it is “Reject”, stay on that page to allow the applicant to see the reason for the rejection.
That’s it, create a form in Iris (or use Data Connection to let Iris generate the forms) add the above code into the form and give it a try.