Foundry allows for the creation of three types of workflows (Link). In this two-part series, I will focus on developing an object workflow. Part one details the creation of a workflow with a resubmit feature, while part two will cover integrating an AI assistant (Anthropic) into the workflow.
Note that for the following example to work, the workflow cannot be deployed to the managed-demo environment because that environment does not allow workflows to be triggered. Use a local environment instead (see this link for guide).
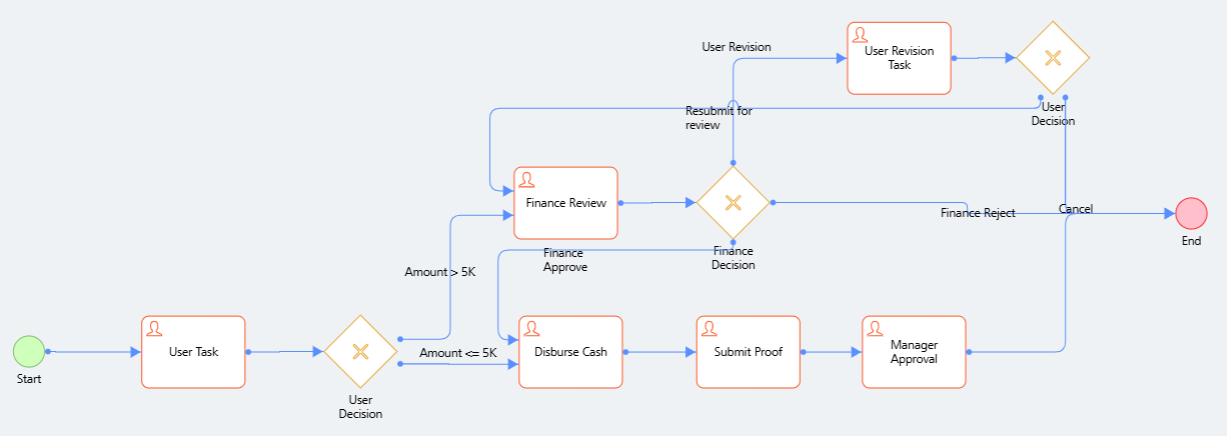
Scenario: The workflow to be created is a cash advance process that will allow employees to submit a request. The Reporting Manager will review and approve with immediate disbursement if the amount is below $5000, but if the amount is more than $5000, finance will have to review the request. On return from the trip, the employee will need to submit proof of trip and receipt, with the Reporting Manager ensuring all is in order. We will start by creating the objects for the records and then a straight through workflow with the ability to resubmit a request.
Create the service objects
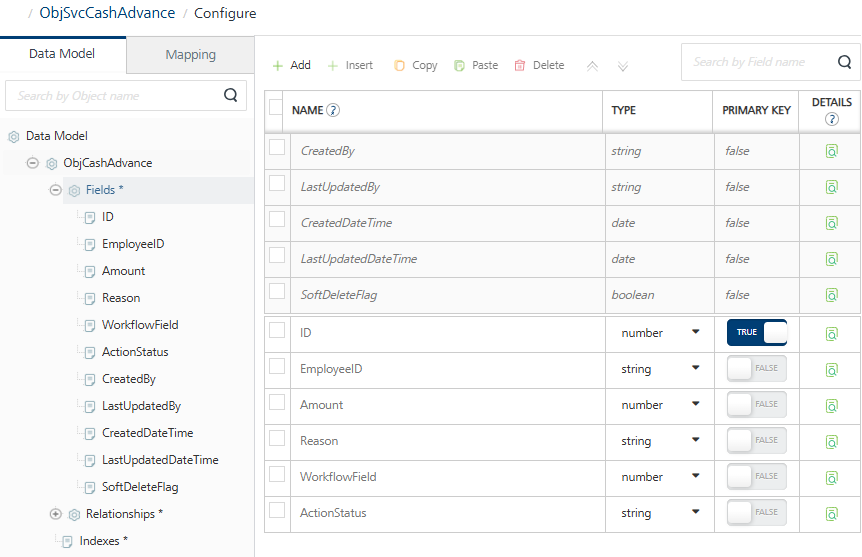
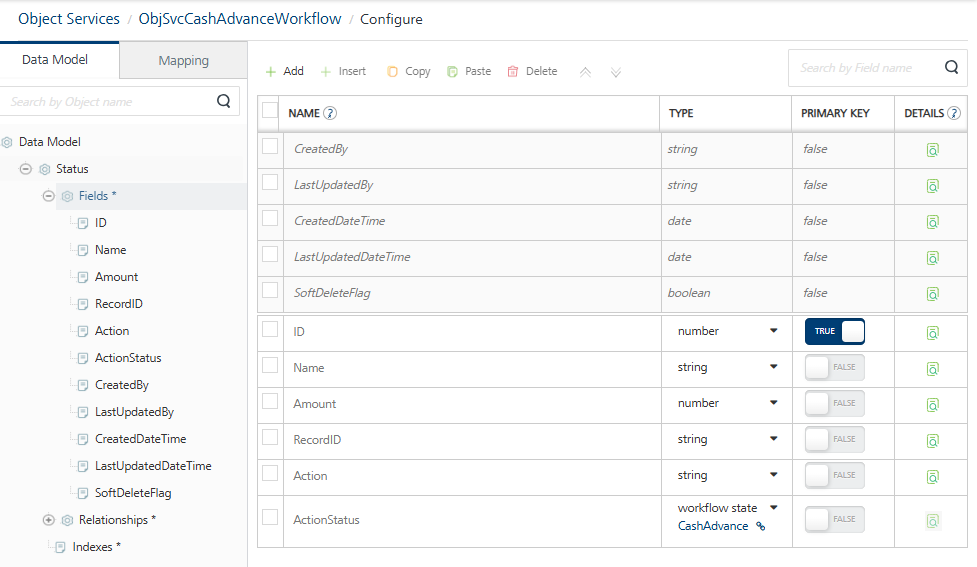
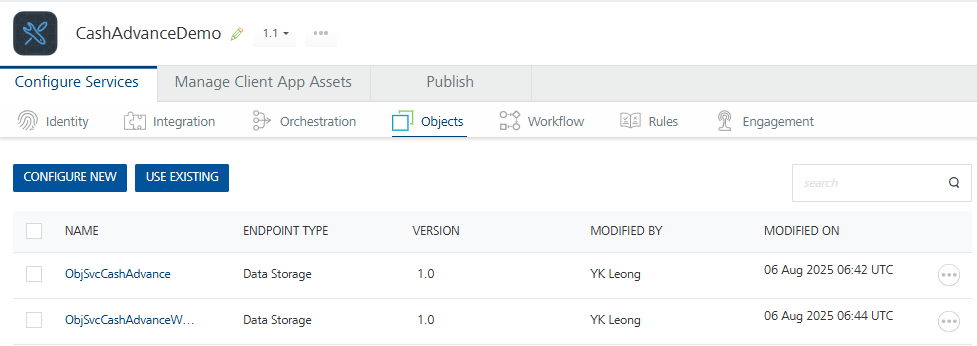
Create 2 objects in the object services. One for the business record ( ObjSvcCashAdvance ) and one for the workflow ( ObjSvcCashAdvanceWorkflow ). In this way, there is a separation of business records and workflow instances. To terminate a workflow instance, the object that triggers the instance will need to be deleted, hence having a separate object will ensure that the business records will not have to be deleted (regardless whether it is a soft delete or hard delete).
Create the workflow
Use Image 1 as a guide to create the workflow, the configuration of each steps are documented below:
User Task
Valid state transition: APPROVE,REVIEW
Entry validation Criteria: No conditions needed
Process Incoming Payload: as shown in Image 4
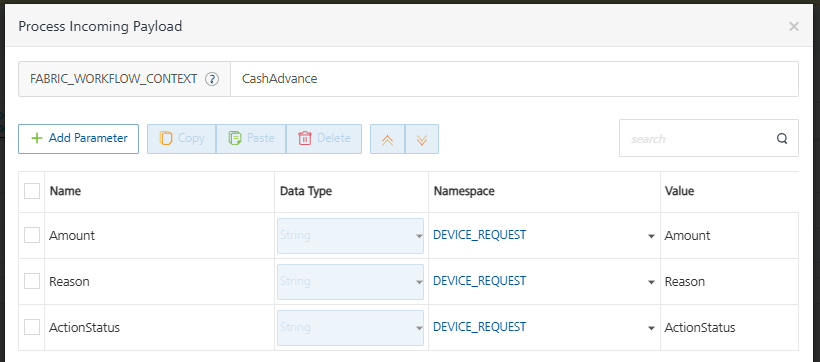
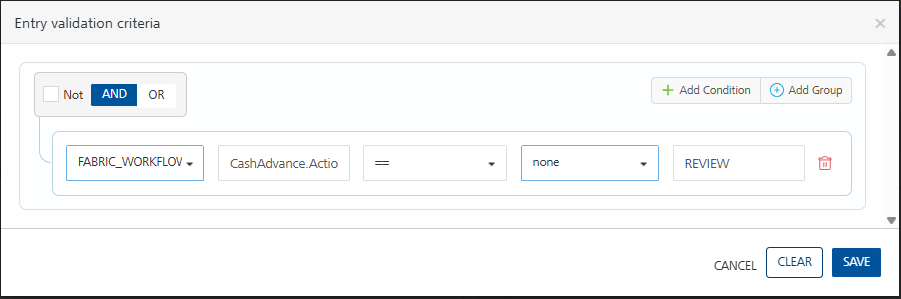
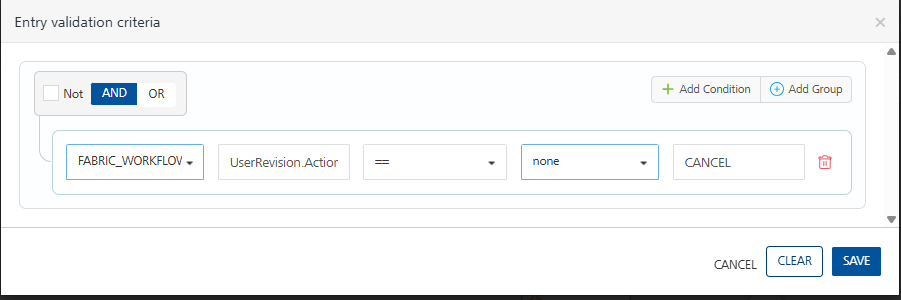
From the User Decision Gateway, click on the connecting line to Finance Review and edit in the Entry Validation Criteria and enter the condition shown in Image 5 (note the name of the Fabric_Workflow_Context is from the Process Incoming Payload of User Task). This ensures that only an amount > 5000 and action status is “REVIEW” will require finance review.

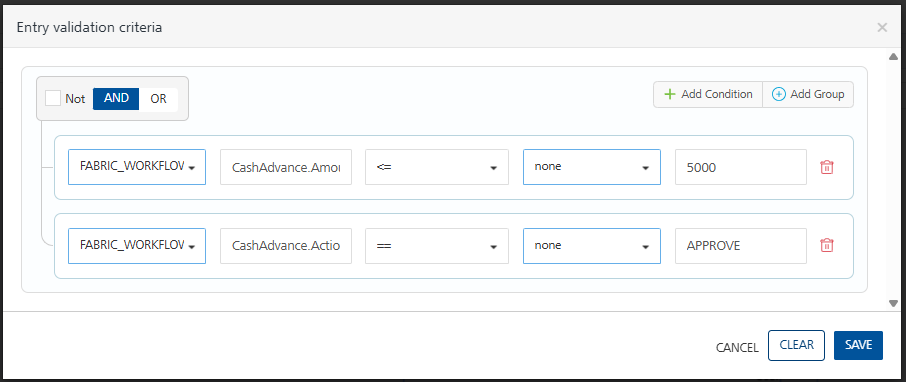
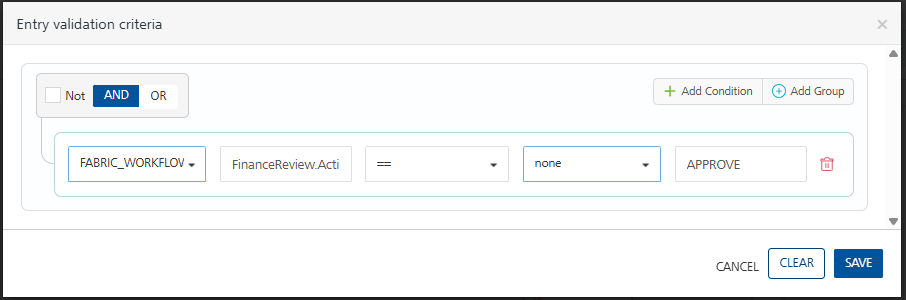
For the second connecting line to Disburse Cash step, enter the following details for Entry Validation Criteria (Image 6).
Finance Review
Valid state transition: APPROVE,REJECT,REVISION
Entry validation Criteria: CashAdvance.Amount (as shown in Image 7)
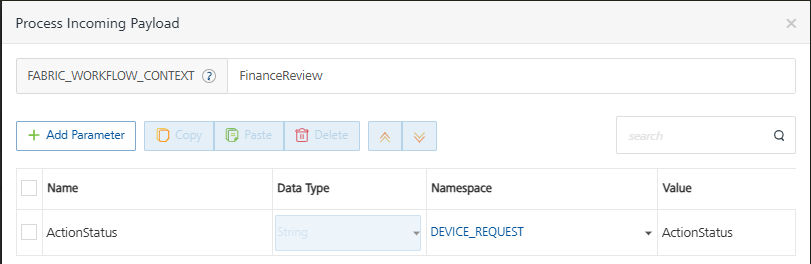
Process Incoming Payload: as shown in Image 8
Disburse Cash
Valid state transition: COMPLETED
Entry validation Criteria: No condition
Process Incoming Payload: None
Submit Proof
Valid state transition: SUBMITTED
Entry validation Criteria: No condition
Process Incoming Payload: None
Manager Approval
Valid state transition: APPROVE,REJECT
Entry validation Criteria: No condition
Process Incoming Payload: None
Finance Decision Gateway
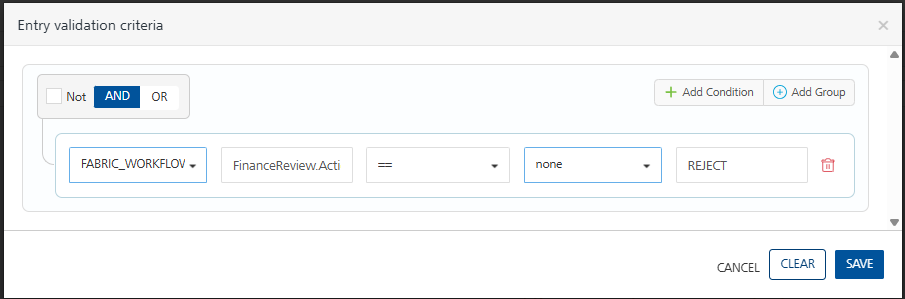
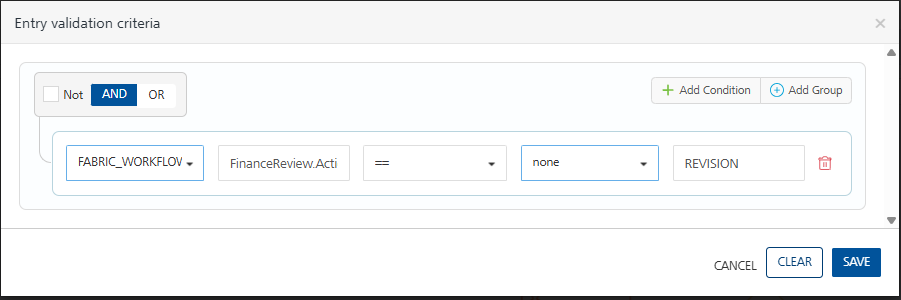
For the Finance Decision connection to the End, use the following condition (Image 9 - note the name of the Fabric_Workflow_Context is from the Process Incoming Payload of Finance Review).
For the connection to the Disburse Cash, use the following condition (Image 10)
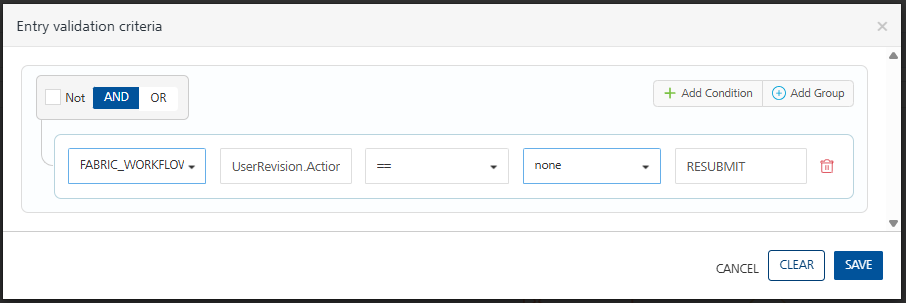
For the connection to the User Revision Task, use the following condition (Image 11). Note that the setup for this step is covered under Resubmit Setup section.
Adding resubmit step
As in all processes, it is good practice to allow applicants to resubmit their requests, instead of creating a new instance, in this way the applicant will not need to refill the submission form.
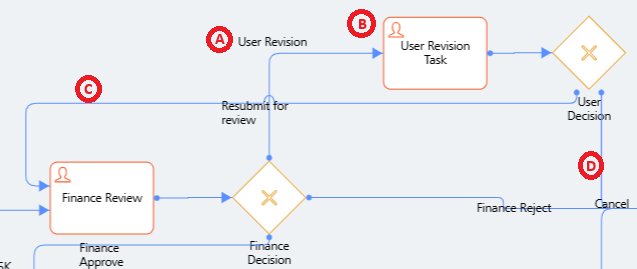
Add a new User Revision Task (B) step into the workflow if you have not done so and configure with the following:
(B) User Revision Task
Valid state transition: RESUBMIT,CANCEL
Entry validation Criteria: No condition
Process Incoming Payload: as shown in Image 13

(C) Resubmit for Review
(D) Cancel
Publish App to Foundry
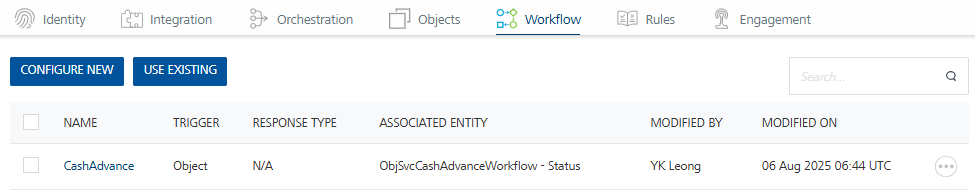
Create a new app in Foundry and add the objects and workflow (Image 16 and 17). Publish the newly created app.
Once the app has been successfully published, click on the link to open Foundry console.

Testing the workflow
Note that as mentioned in the beginning of this topic, workflow section is not available in the online demo environment. The following will only work either in a local container environment or in a production environment.
From the console, click on Object Services and Workflow Services to find the objects and workflow created for this project
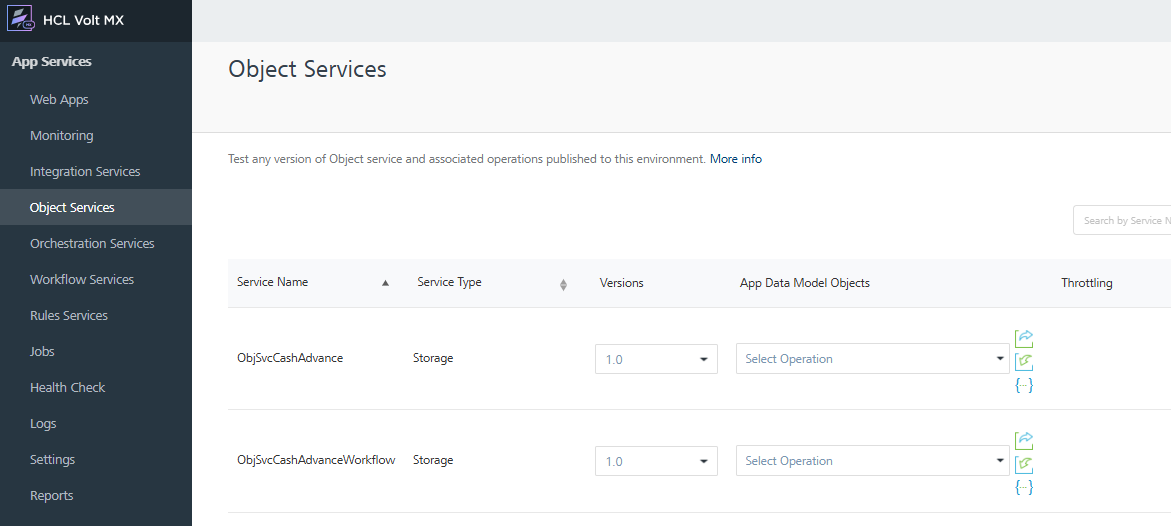
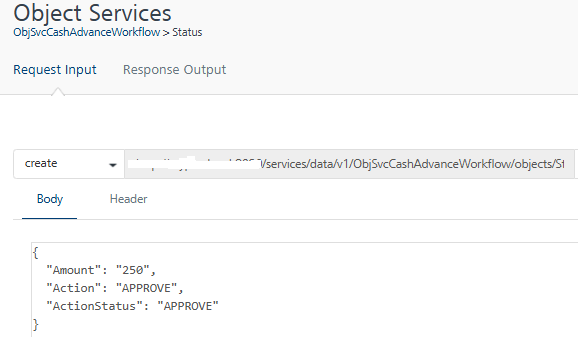
To test the workflow, click on Object Services > ObjSvcCashAdvanceWorkflow, select Status from the dropdown under App Data Model Objects. This will open the page to the REST API call for the object. Since the objective is just to test whether the workflow will work, enter the following and click on the Get Response button. Be aware that the action need to be inline with the workflow’s Valid state transitions (see the individual steps above for the correct actions), otherwise it will not start.
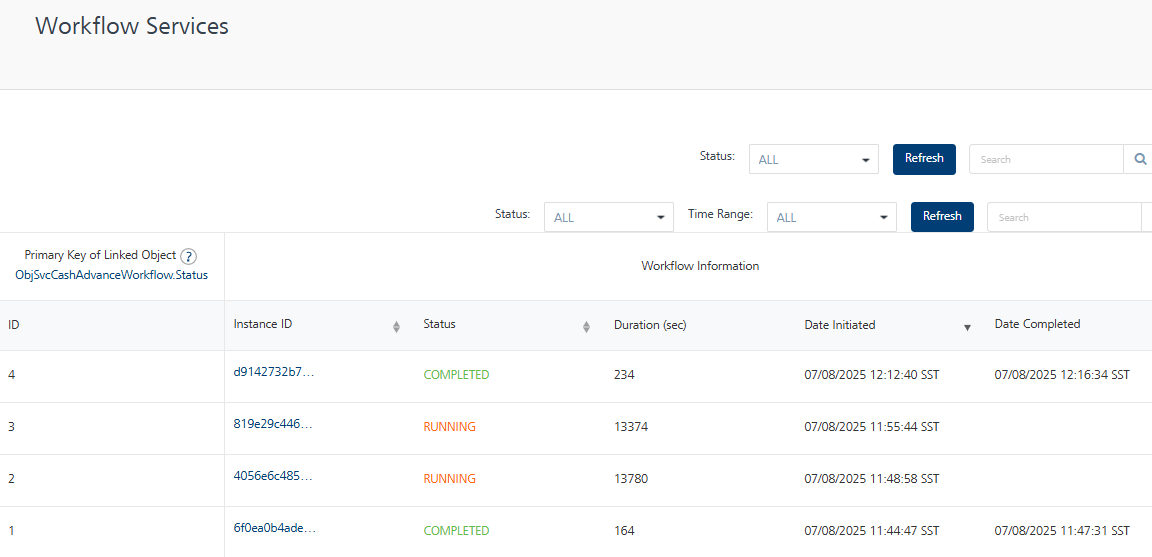
Click on the Workflow Services section and click on the CashAdvance workflow, if the REST API call in the earlier step is successful, a new workflow instance would appear on this page (Image 21).
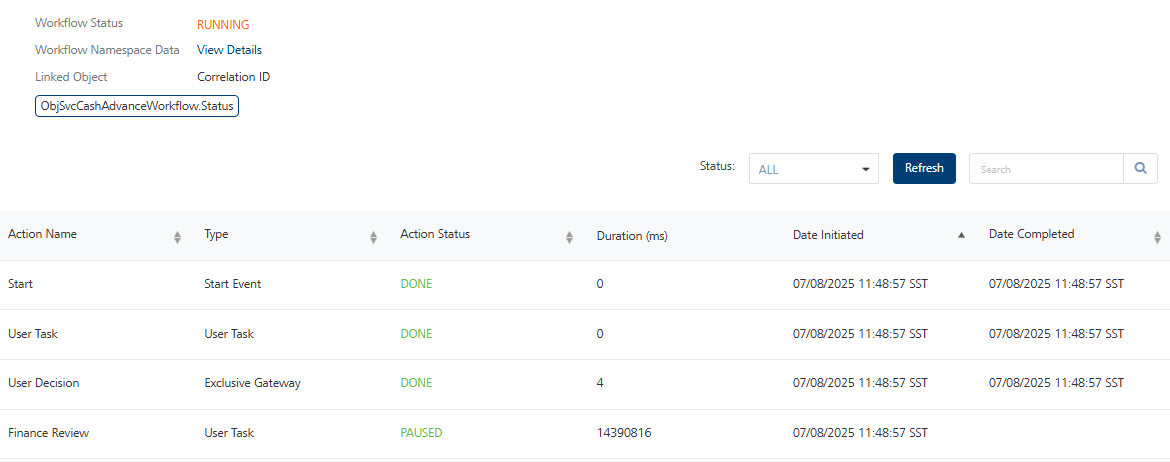
Click through on the instance to see the stage the instance is in (Image 22).
From this point on, keep updating the ActionStatus in the API call to walk through the instance to verify if all the different actions and path are completed successfully. Also try deleting the records in the ObjSvcCashAdvanceWorkflow to see the instance being terminated.
In part-2 of this topic, I will cover adding AI assistant and using forms in Iris to trigger the workflow.